What we are doing:

In what spare time we have, we decided to spend it (and our savings) on remodeling our rowhouse in South Philly. When we purchased our casa it was a 3 story, 5 bedroom, 1 bath that hadn't been touched in 50+ years. It's currently a 4 bed, 2 bath construction site with so much more to do it's hard to believe.

We use this blog to mark progress, say hi to friends and family, rant about the process of remodeling, and try to have some fun along the way.

- Bryan and Christina

Sunday, October 12, 2008

The subtle art of window trim

Today was my part 2 of the window trim work that was long overdue. After creating and installing the sills yesterday, I start out this morning AGAIN watching Tom Silva's trim video. I referred to that in my previous post, so if you haven't seen it and need to do any window trim then you need to watch it. I truly think that if he were to walking into your flooding basement, that he would be able to walk on the water to shut off your water at the meter. He's my Mr. Miyagi.

What I realized about trim today is that all you really need is a fresh 60t blade on your compound saw (especially when your old blade was really used for cutting up demo debris and hardwood flooring), and tons and tons and tons and tons of patience. I was good on the former all day, but the latter started to fade on me after about 5.5 hours of the work today. I won't go into the details, but I'm pretty sure I could be heard yelling some choice words down the block.

In the end I got in the casing trim and installed all of the aprons as well. That's really all there is to it. The tricky parts were in measuring the side pieces to be at least even with each other, and to nails those as straight and flush to the wall as possible. If the nailing isn't flush, then the mitered joint will leave a gap that you will try to work with for ever just to give up anyway with a sigh and that sad feeling of being bested by poplar.

A couple of the windows had that problem from bad drywall, curvy walls, or casing that I had to previously hand plane down (making some high spots along the length). I was able to make the best out of most of those areas, which was a win.

Whatever, this isn't a how to post, because I'm the last person that should be dishing that out in the area of...well...anything. In the end I still need to go back to each window and fill the nail holes.

Side note: I am also on the hunt for a product that I can use to fill 1/8th inch gaps in the trim on some joints. The standard wood fill (at least the Minwax kind I have) is too gritty. I need to find something that is more like a putty. If anyone who read this knows of such a product please don't be shy.

On Tuesday we're getting our baseboard moulding pieces delivered and so I guess next weekend I get to miter for another 12 hours. Only this time on my knees.

After proof-reading this post, I realize it lacks my usual flare for the random thoughts. I think the trim and the dragon slaying yesterday have sapped my strength. Lord knows the celebratory beers at the dragon feast last night didn't help matters. Ugh....

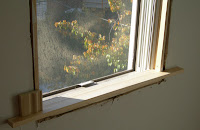
Oh, last thing. Once reason we made our sills so deep is so that the cats can lounge in the windows. It's really the one thing that they seem to enjoy that doesn't involve using clothes or piles of contractor bags as a toilet. So we've encouraged them to lounge and not pee randomly.(I don't think his peeing is random thing myself, I think he knows exactly that contractor bags= loud noises and dirt. Both of which harsh his mellow, so he just wants to make his wishes known- Christina) You'll se my man Marco test driving one of the windows this evening.

Good man. Now learn to use the litter box ALL OF THE TIME!

Saturday, October 11, 2008

Finally slaying the window sill dragon

Hello interwebs people, today was a water shed day for us here in the Grimes house. The "window sill" dragon is now a stinking rotting pile of sawdust. The dragon put up a valiant fight, but in the end it was no match for my measuring tape that was bestowed upon me by the lady of the tool section at the Depot.

Our former contractor walked off of the job after we had a pretty big brewhaha about the window sills. What they installed had structural issues (you could rock them back and forth and they'd bend) as well as a small issue that the two sills in the bedroom did not match the three in the bathroom. I mean the router profiles was totally different and even different materials.

So about 6 weeks ago I tried my first pass at making the sills out of 1x4 and 1x8s (the bedroom windows are fairly shallow whereas the bathroom ones are really deep). I'll refrain for elaborating, but after about 5 tense hours I had failed my mission. And thus the dragon was born.

Fast forward to today, and the fact that we HAVE to get that trim done so painting can wrap up and we can finally move in to the new bedroom. So I have been watching a trim 101 on thisoldhouse.com literally 3-4 times a week for over a month. The link is here, and since Tom Silva can walk on water in any house, his 101 is the trim gospel.

To show you how poorly our new windows were installed, the image on the right is of one of the 5 and it's pretty much what they all looked like. Now, I had pulled out the bad sills and the loose "blocking" but that's it.

After I followed Tom's sage like wisdom, I created all 5 sills in just about 4 hours. 2 are from 1x4 and 3 are 1x8, and since this is a really old house nothing is square. Just because we've gutted and rebuilt this floor doesn't mean that exterior and party walls are magically straight.

The first piece to the install puzzle was to get the sills to be CLOSE to where they needed to be. That meant that I had to basically add blocking or framing where needed to build up the height. the next two pics give you and idea on what I did.

I wound up ripping some 1/2 inch plywood to fit each window's "unique" sizing (in the case of the window in the picture, I had to try and create a level plane on HORRIBLE WINDOW FRAMING). I then added either a ripped 2x3 or a ripped 2x6 fit exactly for each window. That gave me the lower stability that was badly missing from the contractor's attempt at this.

The picture to the left here is what each window ended up looking like when the plywood, 2 by and the sill were finally nailed in (sounds faster than it was). And ignore the horrible look of the drywall around that window, it's another gift from our contractor that I have to fix once the last of the window trim is up.

The next pictures are just of a couple finished windows...one in the bedroom and one in the bathroom. One of the images shows a piece of the trim that we have laying in our living room. It's 4 inches wide so our sills look really long right now.

And lastly Christina took a wide shot coming up the stairs of the bedroom. The banister is still missing the spindles from our floor install, but I'll probably fix that in the next couple of weeks now that I can sleep at night after feasting on the dragon tonight.

(That means beers for the first Flyers game of the season!)

Tuesday, October 7, 2008

For our second wedding anniversary I give you...

...finished hardwood floors. You're welcome. It was nothing, just a token of my affection for smooth floors that look friggin SWEET.

So I'll recap real fast to keep this post short (there is a "debate" tonight after all). After we installed the floors I got total stage fright about finishing them. I mean if you mess up framing a wall or mitering window casing then you just buy more right? Well what if you sand and seal a floor and screw any of that up? You have to strip and refinish the floors all over again. There really are no do overs. Seeing as how I tend to learn a new project by screwing up a couple of times...I couldn't take that chance.

So we hired out, which is just about the last third party to work on our house in the near future. "So I got that goin' for me, which is nice." ---->

Anyway we had a great guy named Van (http://www.vanshardwoodfloors.com) show up on Thursday for a quote and did the job today. Below are some pictures of the floor as it is right now. In the end we elected to not stain the floors and just have then sanded a bit with 3 coats of poly. The floors are really wet right now and you can see that in the pictures...hey it's a messy job. And also let it be said that the fumes from the job are crazy. Don't underestimate how much the poly smells, and you can even taste it.

The floors will be dry enough to walk on tomorrow, but we'll probably not get up there until the weekend. Then it'll be putting the new bed together up there to get those damn boxes out of my workshop, and the mattress/box spring out of our living room.

It'll be a magical moment. We still need to install the window stools and all of the trim (casing and baseboards) but I think we can start that next week-ish.

On another note, months ago I ripped apart the electrical for the third floor and half of the second. This was in late May before the demo was 100% done. Anyway, over the past weekend I ran new lines up to the second floor and rewired the office/workshop. It was a pain in the butt having to use flashlights at night and not being able to work in there after like 5:00. The picture on the right doesn't look like much, but there was a lot of wiring up there to even get the lights to work. I've added one new outlet right now, and I'll be adding 3 more in the next couple of weeks.

The wire sticking out of the box is for the (to be delivered and installed) recessed lights that are going in the soffit. I'll split the feeder line and that's it.

So yeah, that's about it right now. Today is in fact our second anniversary, and with the house stuff and life things, we both half spaced it until last evening. We're hoping that it's not a harbinger of things to come for the next 70 years.

So you know, my anniversary gift to Christina was completely cleaning out our dump living room and the basement. Things are finally where they need to be and we don't have piles of lumber in the living room. For her part, Christina paid Van for the floor job...so I didn't have to do it. That's a gift I'll take any time. (I was really hoping that wood was the 2nd anniversary gift, turns out that is the 5th, so maybe we got to that one early. Too bad this year was cotton-Christina)

Aint love grand?

Monday, September 29, 2008

And we thought drywall was a MIRACLE!

So, when the drywall (well the first day...not the results or the work we had to put in ourselves) went up we were so happy to see the great progress. Well, that has been bested! We now have working lights, and working plumbing. Definitely a huge milestone, and one that I honestly wasn't sure would ever happen!

This picture should help explain the tub location at the stair landing, also we did have a casualty today, the marble ledge in the picture didn't make it through the days activities. The feet of our blogged about tub might be a little wacky, and thus gravity took it's toll. What can you do? If that's all that came out of having people working on our house today and not (for once) royal screwing us...it's a TOTAL win.

So for the recap: on Friday we paid the extortionists their money to finish the electrical, which was done 90% right, but I can actually turn the lights on to close the windows at night, and not feel like I was going to step on a saw, nail, or weird metal item. (btw we got our green sticker for a pass on our FINAL electrical inspection today) Then we spent the weekend working on the floors, which look really good, and also solved another previous problem, of being able to see into the bedroom below through the subfloor gaps, especially in the dark while closing the windows. Kind of unsettling at times.

Then today we had a new set of handymen/plumbers install the plumbing. The sink, toilet, tub filler, tub, and shower are now all in place. Notice the water filling up the bathtub (ignore the lack of window trim, that's on the list)?

The picture on the right is the shower fixture we created. And before any eye rolling begins, yes this is another shot of the shower, but at least it's something new. Anyway, the main part of the fixture was purchased at an architectural salvage place here in Philly. We fashioned the connections up from chrome pieces and threw on a rain head just to make the thing even more antique/industrial/modern.

We should wear black framed glasses and refer to ourselves in the third person. It looks that good. Believe it.

So yeah, I suppose that's it for now. the bathroom is ready to roll with just some misc things left like window trim, the missing marble and new radiators. But hey, it's not winter, trim is overrated and marble?!?! Whatever. All will be solved in the next month or so we hope.

Hardwood floors and an instant love of being done.

Done*. There, it's nice to type that: D O N E*. The hardwoods have been successfully installed in the third floor bedroom. Now, as usual I have a caveat to my declarations, and this time it's that the floors we bought are unfinished red birch.

Whatever, those are the details that the devil resides in.

Right now I'm savoring the sweet smell of hardwoods being laid over 2 days this weekend, with a little extra help. My past experiences with hardwoods involved mainly walking on them and Swiffering as needed. But hey, everyone has to learn to live on the edge at some point.

Our friend Graham helped us (THANKS GRAHAM!) on Saturday to get the ball rolling. Luckily we own all of the tools needed like a chop saw, jig saw, air compressor, and even a table saw (which came in really handy for ripping boards). The only thing we needed was a floor nailer which we rented at the Depot.

Well in the end we rented three as the third time was a charm:
  • The first had a crazy "nozzle"/"adapter"/whatever. It's like someone took the real one off to use some industrial size air hose
  • The second looked the part, and we were excited to see that the thing would at least hook up to the compressor. Well, after hooking up the hose our hopes were dashed. Someone, it seems, decided to do some field repair on the rental and neglected to replace the main gasket. So air was just passing right through the thing. We soldiered on with a stiff upper lip, but all of the wads of duct tape couldn't help. It was a trip back to the Depot.
  • The third, it was just right! This time I made the guy at the Depot hook the nailer up and I even decided to try it on some flooring sample right there.
At this point we were like 2+ hours behind schedule and time moves for no man.

Once we got back everything went pretty darn well. Considering the weekend was like living in a Swamp around here (thanks hurricane Kyle), the floor went down with just minimal pools of sweat on the unfinished floors. (Christina chased me around with a bandanna for most of the weekend) What can you do?

Sunday saw me finishing the main part of the bedroom and then dealing with all of the cuts needed to wrap around the 4 closets in there. That was "fun" and "I can't wait until I can do that again". Yeah, that's it.

*crickets*

Whatever, after some total mental lapses involving tapes measures and being able to, well, actually measure, the floor went down. The last (and craziest) part of the install was at the third floor landing near the bathroom and along the stairs. There were 100+ year old spindles nailed into the original pine subfloor that we were going to obviously cover. Our solution? Use scraps of the floor as spacers of sort. Then I just stood on the stairs and reached up to cut them with my reciprocating saw. And it totally worked. The cuts aren't 100% flush with the flooring but they're close enough to make a HUGE difference.

The old bullnose was removed and some spiffy new stuff picked up by the Boss today. She does have a good eye I must say.

Anyway, the floors were run and cut to the end of the subfloor and the new bullnose tacked in. The only "problem" with the bullnose is that the edge curves gently 90 degrees and they didn't have that piece. So until we decide to lose our minds and pay $200 for a custom milled 90 degree curved piece that's like 4 inches long...there's going to be a gap. Sue us.

You basically see the final product in the picture to the left, but probably better on the right. See? Ok, so some spindles didn't make it though the flooring install, but they're in a nice little stack waiting to join their friends once again.

Just wait until we post the pictures of the plumbing fixtures now that they've been installed....and WORK!

Electricity (that was Friday) + floors (you know, unfinished) + plumbing = A happy house. Or at least until the stress of staining the floors happens...

Sunday, September 21, 2008

Long time no typing at you!

So fall is here and of course the project that had no end in sight...has an end in sight! I'll wait until you recover from fainting..................................OK, let's soldier on with the blabbering blogging.

So we've been busy over the past 3 or so weeks with finishing the grouting in the bathroom, some light framing/construction, and some (more) painting. The third floor is ACTUALLY slated to be done(ish) by Monday. "What are you talking about Bryan...we know about the contractor drama, so how can you be about done(ish) on Monday?

Note: done(ish) means that all I have left is the window trim. Can do.

Well, glad you asked. In the end (and tons of phone calls and conversations) we decided to pay the electrical subs to come back and finish the job. Yes this means that we'll be paying them essentially AGAIN for the work. Yes that sucks. And yes, we fully plan to recoup our money in the end. I can assume you know what drama that will mean in a few months. But I digress....

So the sub is coming back Friday and we're finally going to have power and lights up there. Big win. We spoke to the plumbing sub a couple of times 2+ weeks ago, but then he stopped calling us back. After we called ever.single.day.for.two.weeks. Needless to say, he hasn't convinced us that he is worth paying. This still leaves open the nonsense about our contractor never paying them, but we'll deal with that when we come to it....but whatever. Honestly, and not to be too gross....I need to make #2 in our new bathroom after all of the checks I've heaved out of my wallet. There I said it. Sorry everyone. (that last thought will FOR SURE be deleted by Christina in the next 18 hours I just know it)

We did let the plumbing sub know our intentions to use someone else with "if you don't call us back by end of day...yeah yeah..." you get it. But Monday our replacement guys will be here bright and early to finish the work. Damn straight.

In the meantime, I will be attempting to install the hardwoods in our bedroom with our friend Graham. This will be on Saturday, so hopefully that adventure ends like "Return of the Jedi" and not "Empire Strikes Back" by Sat night. At this point only the magic 8 ball knows.

Anyway, how about some pictures?!?! How about THE LAST PICTURE I WILL EVER POST of our shower? (you're welcome for the "last...ever" realization). Note the fantastic grout work, and matching marble ledge and curb?

If you work through previous posts, or have a memory that I can't even pretend to possess, you'll know that under the new bathroom is our old office (now workshop). Well I had a couple of decent days and worked on the soffit that will house the plumbing and recessed lights. We're so fancy I feel like I should be wearing a suit all of the time. Pin stripes.

Here's the result of my effort. To be truthful, this actually took me two weekends. One Sat to start building it the way I thought it would work the best...with me ripping almost all of it down the next day. Then this past weekend I got my head out of my proverbial #2 and did it right. The product is to your left.

Hey family and close friends...want to come over and stay for the weekend? (a few of you have braved our work cave in the past) AWESOME! Here's what our living room looks like right now. So come on over!!!

And yes that's a mattress and box spring in our living room. We ordered them in June thinking that (HAHAHA) we'd be using them upstairs by now. I got a little antsy over the past couple of weeks since we paid for them and they weren't in the house. And given how well our recent track record of paying people to do or deliver things has been going...I wanted them in our house. So add in the 120 or so feet of window casing we have lying around, and the place is like cat hide and seek heaven.

I guess to wrap this latest update up I'll give you a picture that we find kind of funny. What do you get when you cross someone grouting and needing bucket after bucket of water, with another person who spent 30 minutes mopping the kitchen floors?

.
.
.

<--- That. New uses for those silly grocery bags.

Monday, September 1, 2008

Dreaming in paint colors

We hope everyone had a relaxing holiday weekend. Christina and I both skipped work on Friday, so that gave me 4 days to be covered in paint and really experience Labor Day weekend. I spent the first two days putting the second and third coats of red on the wall, as well as the second coats of green and the "blue" (again with the quotes). All I have left is some patch work and a second coat of white in the bedroom. I really was on the fence about the second coat of white, but I think that's just being lazy. Two coats are minimum in my book. For those playing along, 8 gallons of primer and 9 gallons of paint.....

We decided to go with low VOC paint that we purchased from Duron. I have to say that I was really surprised how well it covered given that I had read a few reviews/opinions that low VOC paints don't cover. Now granted, I primed every wall twice and for the red and green walls I also primed them grey....but still the low VOC stuff is nice. Plus since it hardly smells, you can paint all day without any headaches or feeling ill from the fumes, just maybe like a little play-doh. The red had to be a traditional base since the low VOC bases are for light and pastel colors. That's an FYI if anyone wants to go the low VOC route.

Everything else is wrapping up. Niko put in some long hours after work last week and finished laying all of the tile in the shower before the weekend. I'm hoping that he'll decide to come back and grout this week, unlike our contractor. I need the tile and paint to be done, and I think it's about there.

I'm including a few pictures of the completed shower for those who might be interested. The shampoo bottle on the recessed shelf was a test for my sanity. I had a moment of panic today thinking that the shelf we created wasn't big enough for a standard shampoo bottle. Needless to say, our architect won't be yelled at today, because it fits. Whew.

The items that are left for this floor are:
  1. grout
  2. install the plumbing fixtures
  3. install the electrical items
  4. lay the hardwoods in the bedroom
  5. put in the correct sills that we ripped out
  6. trim
The problem for us is that #2-6 were supposed to be done (correctly) by our former contractor. As we're still trying to figure out what the next step with that mess is, we might be waiting a few weeks to wrap it up. UUUUUUUUUUUUUUGGGGGGGGGGGGGHHHHHHHHHHHHHHH. Anyway, hopefully we'll make that final decision after we talk to his bonding company and get some legal advice. It's getting ugly around here for sure.

To round out the posting, I took a couple pictures of the space. This first is where the tub (that's being used for tool storage right now) will go overlooking the stairs. The little unfinished lip you see has a marble top and it's bathroom side will have the baseboards wrapping on it. Fancy-schmancy I guess.

The last picture is of the niche that was created on the outer wall of the shower in the hallway. There were some adventures getting that niche there, framed properly and the tile on it....but there it is. Man, it's crazy seeing it and thinking about ALL of the work that damn thing was. But hey, I'm just the hired help right, and the architect seemed to be really attached to it?

So I guess that's it. if we do wait a few weeks to finish the third floor as I mentioned, then the next project is framing in the soffit in the office on the second floor. It's currently my workshop, but getting that soffit built with new electrical run to the room is infinitely more fun than painting. Any day of the week. It's not like we are going to run out of projects anytime soon!